Showing posts with label beautician. Show all posts

Sunday, 26 October 2014

New Makeup Haul

MAC 'Mehr' Lipstick - I specifically went to the MAC counter for a lipstick because I had mentioned in my previous wish list post that I was looking for a colour similar to what Kylie Jenner had been sporting. When browsing lipsticks and eyeshadows I reach for the colours that catch my eye and because I was looking for a 'dark browny pink' shade I instantly picked 'Mehr' up, which is not a colour I had mentioned in my wish list. I swatched the colour on my hand and I really liked the look of it but before buying I asked one of the makeup artists to show me 'Velvet Teddy' which she then told me is out of stock, I didn't want to walk away with out a lipstick so I decided on Mehr as I thought it was closest to the colour I had been looking for, possibly a little darker but I love it. In my wish list I had also mentioned the colours 'Faux' and 'Twig' but after doing more research I thought 'Faux' was too light and sheer and 'Twig' was lighter than I was looking for too but I would possibly buy that in the future. MAC describes this colour as 'dirty blue pink' which is an interesting way to describe it. I usually don't like to buy MAC lipsticks instead I wait until I have 6 empty containers so that I can earn a free lipstick through the 'Back to MAC' programme but unfortunately this time I was 2 short of a free lipstick! 


MAC 'Pink Treat' Cremestick Liner - After choosing a lipstick I asked the makeup artist to match up a lip liner. She asked me if I was going for the 'Kylie Jenner look' which I'm sure is a frequently asked question at the counter, she then told me that this is in fact the lip liner Kylie uses herself and luckily it was in stock. I'm so pleased with this liner it is so easy to use because it glides on so smoothly and it stays in place and lasts much longer than any other liner I have used.  I have been using MAC 'Dervish' lip pencial for some time now which wears off very easily so I would definitely recommend the MAC Cremestick liners over the regular lip pencils which are the same price. 


In this picture I am using both 'Pink Treat' cremestick liner and 'Mehr' lipstick


MAC 'Girlie' Eyeshadow - I couldn't leave the counter with out picking up an eyeshadow to fill a space in my palette. I was looking for a dusky pink colour mostly to use for a simple everyday look instead of using browns and neutrals. I probably could have picked a better colour but it was a last minute decision however I used it last night as a base colour for a smokey eye and I was pleased with the outcome. This colour is described as 'rosy-pink with subtle shimmer'. 


In this picture I have incorporated 'Girlie' eyeshadow in a smokey eye along with MAC 'Quarry' 'Sketch' 'Mulch' 'Gleam' 'Shroom' eyeshadows, MAC liquid eyeliner, Barry M Lash Vegas Mascara and I used my HD Brow and Eye palette to fill in my eyebrows. 


MAC Liquid Eye Liner -  I always buy MAC liquidlast eye liner and I swear by it but this time I thought I would go for something different, which was a mistake. Although I am getting use to the different applicator which possibly makes for a more precise finish than the liquidlast brush, I find this liner smudges and wears off easier when worn on its own with out eyeshadow. 


I also repurchased 2 of my must have and favourite makeup products which are the MAC Pro Concealer Palette and Charlotte Tilbury Light Wonder Foundation.

http://www.maccosmetics.co.uk/product/157/23772/Products/Face/Concealer/PRO-Conceal-and-Correct-PaletteMedium/index.tmpl

http://www.charlottetilbury.com/uk/light-wonder-8-medium.html

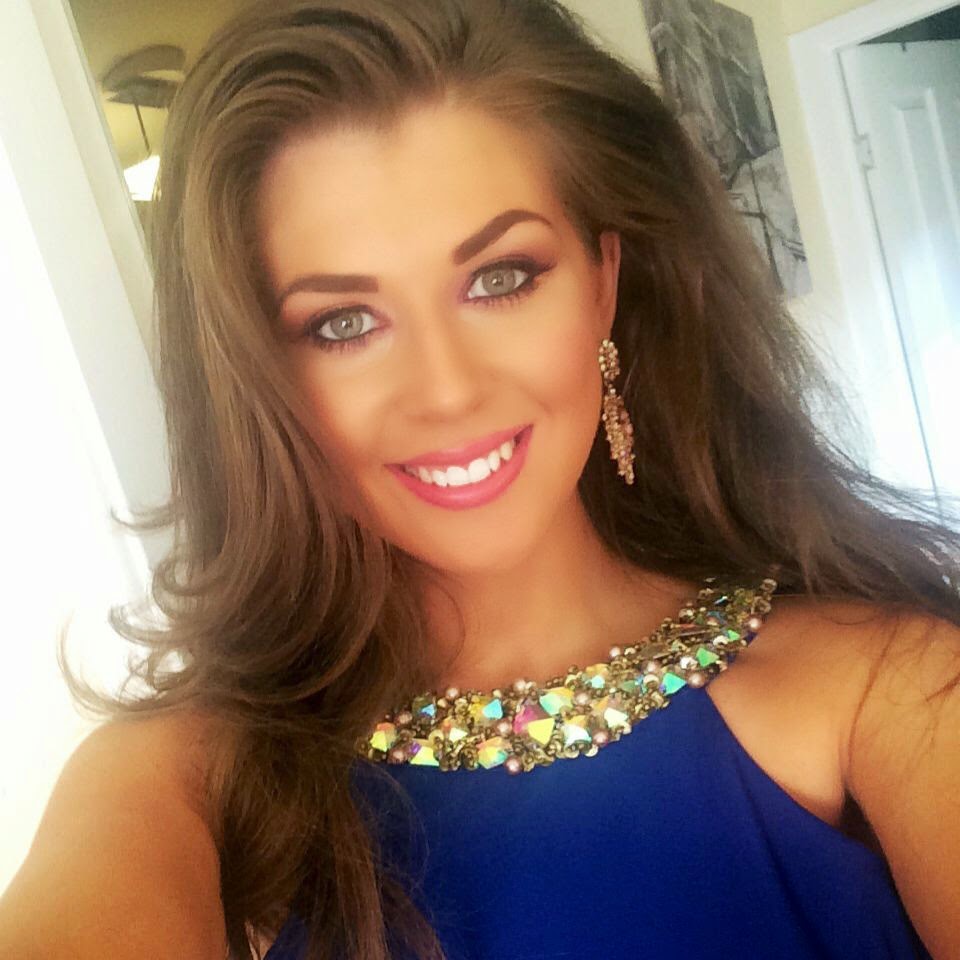
In this picture I am wearing all of the products listed above.

Tuesday, 1 July 2014

Recent Makeup Look


This is a makeup look I created to attend a wedding, the main focus of the look was the eye makeup, I was going for an 'Arabic' look, I teamed that with my regular face routine and my favourite MAC lipstick 'Pure Zen' which goes with so many looks. I used the MAC eyeshadows 'Plum Dressing' and 'Amber Lights' these stunning colours worked beautifully together and really complimented my green eyes. 
Unfortunately as much as I tried to capture the beauty of this eyeshadow, my camera didn't pick up the colours and attention to detail as well as I would have hoped but I will be recreating the look and posting a tutorial soon.

I'm wearing 
Dress - Chic Boutique Darlington 
Earrings - Ebay 

(I created natural looking curls in my hair using GHD's)

Tuesday, 10 June 2014

My Eye Makeup Rules


If you hadn't already realised I am a bit (a lot) of a makeup fanatic. I'm not ashamed to admit I like to wear makeup everyday and I am one of those people who won't go to the corner shop with out a little makeup, thats just me! When I have a night out I don't only look forward to getting out and having a drink and a dance, I get just as excited to do my makeup (my eye makeup in particular) and I like my makeup to be perfect, so this could mean sitting in front of the mirror for an hour and half - I'm not going to lie I have probably spent 2 hours perfecting my makeup in the past and then of course there will be regular top ups through out the night. The makeup must go with my outfit, the lipstick must compliment my eyeshadow, these little things are important. Obviously not every girl is as obsessed with makeup as me but if you are going to wear it, you may as well wear it properly, otherwise its pointless. We all know about the major makeup faux pass; the tidemark, blusher overdose and being plain orange to name a few, but when it comes down to eyeshadow some will simply apply a block of colour on their lids and believe they're good to go. However eyeshadow is designed to compliment your eyes, make them pop, there are shades created for your eye colour in particular and applying that one block of colour is more likely to distract from the beauty of your eyes. So there are few things to consider when using eye makeup; colour, contrast, eye shape and size, application and most importantly blending!


Eye colour
So lets begin with colour, every persons eye colour is different, there are different shades of blue, green brown etc and what eyeshadow may look stunning on someone else's eyes may not look as great on your own. This is why you should find the shades that suit you, this doesn't mean to say you have to stick with a select few shades you can incorporate a colour that suits you with something that doesn't necessarily make your eyes stand out but gives them some definition. I have 'greeny blue' eyes, some days they will look really green and some days they look more on the blue side. I know that purple, pink and red colours compliment my eyes because they are opposite to green on a colour wheel which means these colours contrast, however they are not the colours I would opt for every day and such vibrant shades may clash with an outfit I am wearing, so I tend to go for browns, bronze and gold tones which contrast with blue on the colour chart. If you are uncertain on which eyeshadows may compliment your eyes you should ask at a makeup counter, this is what I done at MAC a few years ago and they recommended some colours for me, there are also lots of makeup tutorials on youtube for particular eye colours.

Here is a colour wheel, find the shade closest to your eye colour and the shades opposite that are contrasting colours which will compliment your eyes!

Eye shape
Eyes come in all different shapes and sizes and this is something to consider when applying eye shadow. Take a look at the picture below, what shape are your eyes? I would say I have 'almond eyes' which are pretty easy to work with. However for some eye shapes there are techniques which should be avoided, for example if you are someone with 'close set eyes' you should steer away from using dark shades in the inner corners of your eyes as this will draw them even closer together or if you have 'deep set eyes' I recommend you stick to using lighter colours on your eyes because dark colours will make them appear even deeper. 

Blending 
 Blending is definitely the easiest step in eye makeup application but it is the step that people over look the most. I can not stress enough how important blending is, I see so many girls have missed out on this crucial step and I just want to get my MAC 217 and blend blend blend! Think eye makeup what springs to mind...what would you ask for if you were having your make up done by a pro... smokey eyes, always, and let me tell you theres no smoke with out blending. I think I have made myself clear. 

Colour placement
Light/vibrant/metallic/shimmery colours - Should be used as the base colour, this colour is the main focus, applied on the lid or/and possibly on the lower lash line. 

Darkest colours - Should be used in the outer corners and in the crease/socket to create definition and possibly on the lower lash line. NEVER on the brow bone!

Light/pale/sheer colours - Should be used as a brow bone and inner corner highlight to open the eyes.

Transition colours - This colour is used to blend and fade out the darker crease/socket colour.

An eye make up look I created on myself

Eyeliner 
Lets not forget to mention eyeliner which is possibly used more regularly than eyeshadow. Eyeliner can certainly be tricky to apply but practise makes perfect and If it is used correctly it can really open up your eyes, however if it is applied too thick it will make your eyes appear smaller and tired. Eyeliner should be applied thinly from the inner corner and gradually become thicker towards the outer corner and to finish a flick should be created, which I like to call the 'feline flick'. This can be worn on its own or with eyeshadow however I would never just line my waterline with out applying eyeshadow as this really tiers my eyes. 

Kendall Jenner with the perfect 'feline flick'

Monday, 9 June 2014

May/June Makeup Favourites

Below are the makeup products I have been loving the most recently, I haven't been buying a whole lot of new makeup lately because holiday shopping and saving is my priority at the moment but I have been experimenting with the products I already own and trying some new looks! 

Charlotte Tilbury Light Wonder Foundation - I had to mention this in my favourites, up to now I have only used a sample of this product but I absolutely love it, to find out why check out my recent blog post for a full review here.


MAC 'Let Me Pop' Paint Pot - I love MAC paint pots, this is the third one I have bought (sadly the first one I bought in the colour 'Bare Study' was short lived - always remember to put the lid back on after use or the product will dry out). I bought 'Let Me Pop' which is described as a 'frosted light copper' at Christmas time and wasn't so impressed with the product at first because I thought it was wearing off really quickly, recently I tested it out again and applied it in a different way and now I can't get enough of it. I found that unlike MAC 'Painterly' paint pot, 'Let Me Pop' is quite oily and needs a base to stick to, I tried this colour over 'Painterly' and I had not only long lasting results but a more intense pop of colour than I would of if I was to use the product on its own. I have also used 'Let Me Pop' for a light shimmer effect over eyeshadow, to do this I just lightly dabbed the product on to my lids on top of the eyeshadow I have applied. This colour is so glittery and gorgeous and it is perfect for a night out. 


MAC 'Antiqued' Eyeshadow - This colour is described as 'ash brown with bronze'. I have had this in my makeup collection since 2011 and I still have quite a lot of product left. Since I began filling up my MAC eyeshadow palette I neglected my older eyeshadows and was excited to use all the new colours I had bought. Recently I became bored with my everyday statement 'feline flick' and swapped it for a neutral smokey eye using MAC 'Mulch' (which I have mentioned in a previous post) but last week I tried something different again with 'Antiqued'. I first applied my trusty MAC 'Painterly' Paint Pot all over my lids, then I used 'Antiqued' all over my lids, slightly above my crease and lightly under my eyes, to create some dimension I used MAC 'Texture' eyeshadow as a transition colour above my crease and as always those brows need a lift so I used MAC 'Shroom' as my brow bone and inner corner highlight, to finish off I lined my water lines with a black eyeliner and applied lashings of mascara. This look is so easy to create and really brings out my green eyes.

An everyday neutral smokey eye look created with MAC 'Antiqued' 


MAC 'Texture' Eyeshadow - As I mentioned above I use 'Texture' as a transition shade, the colour is described by MAC as a 'peachy brown with shimmer'. Recently I was experimenting and found it is also a perfect contour colour for my skin tone. This colour is really intense and pigmented but when it is used correctly and is thoroughly blended it creates the illusion of a perfectly chiseled jawline and cheek bones. I must mention this product is hard to get hold of, I went to various MAC counters before I finally got my hands on it, I'm not sure if it has been discontinued or is in high demand therefore is usually out of stock. 

This may appear a little dark for a face contour but remember blending is the key! 

Monday, 19 May 2014

Summer Nails


This week I decided to get in to the summer spirit and go for some bright nails. I'm loving this vivid orange Gelish colour called 'I'm Brighter Than You' it has been really popular with my clients and I've been dying to try it myself. I've had lots of compliments about them and surprisingly it looks great with so many outfits and colours, I think its a colour I will be referring to through out the summer! 

Thursday, 8 May 2014

New MAC Eyeshadows

No shopping trip is complete with out a visit to the MAC counter. I'm a MAC addict and in my opinion you can never have too much make up. As much as I want to buy everything in sight when I am there, since Christmas I have been concentrating on filling up my MAC eyeshadow palette, I have finally filled up one side of the palette with neutral colours and I am now beginning on the second side where I am opting for a mixture of colours from purples and pinks to blacks and greys; any colours I think will be popular and look good on different eye colours and basically any colours I just can't resist.
 On this visit to the MAC counter, I bought 'Quarry' which I have been wanting to pick up for a while after hearing MUA Tanya Burr recommend it and put it amongst her 'Top 10 MAC eyeshadows' this filled the last slot in my neutral palette.
I then began to look for brighter and bolder eyeshadows, with me having green/blue eyes a lot of colours work with them and make them 'pop', in particular purple. The eyeshadows 'Stars N Rockets' and 'Plum Dressing' immediately stood out out to me. I haven't yet used these eyeshadows as I have been busy but I can't wait to experiment with them and use them with different colours to create some gorgeous eye looks. 
 Choosing eyeshadows (or anything) at MAC can be quite hard and a little overwhelming as there is so much choice, but the staff are always very helpful and can advise you as to what colours will suit you. 
If you would like to ask me for some advice on MAC eyeshadows or on anything else you would like to know feel free to leave a comment or contact me through facebook, twitter or instagram! 

I will soon post some pictures of me wearing these eyeshadows and I will also be writing a post on my favourite MAC eyeshadows in my palette.  


 'Quarry' (soft muted plum brown)
'Stars N Rockets' (purple with pink pearl) 
'Plum Dressing' (pinky plum with metal)

Saturday, 3 May 2014

Gelish

Originally I aimed to carry out acrylic nail services in my salon after passing my Nail Technology course at college but I then later decided against it when I came to realise how time consuming the treatment is and I also became conscious of the damage the process of applying acrylic does to our natural nails. Although some people still do prefer acrylic nails, I have found a lot of my clients have turned against them and now prefer to enhance their natural nails with gel polish. 
Gel Polish is applied like a regular nail polish with the 3 steps; base coat, colour coat and top coat but the service requires a little more preparation to ensure beautiful nails that should last 2 weeks. 


The benefits of gel polish are that you don't have to wait for it to dry, it just simply needs to be cured under a UV or LED LAMP and after that you are ready to go with no worries of smudging, chipping or denting the polish. As with any treatment after care is important so if you want to maintain the perfect manicure I would advise you to steer clear from strong chemicals (like acetone or bleach) which may cause the polish to peel, or if you must do so, wear gloves to avoid direct contact with your nails. 
When your nails have grown you will be able to visibly see the growth and it may be tempting to start picking away but you should not remove gel polish by peeling it off, this will damage your nails and make them brittle and weak.

Gelish after 3 weeks! 

Removal of gel polish is also easy, this can be done at a salon or at home. To remove, finger nails need to be soaked in acetone for around 10 minutes, after that you will be able to see that the polish has lifted from the natural nail and you should then push off the polish with a cuticle tool. To finish, a buffing file should be used to smooth the surface of the nails and remove any remaining traces of the polish. 

I started collecting gel polish for my salon just before Christmas, there are many different brands of gel polish but after doing my research and test driving products from various brands, I decided to stock Gelish by Harmony Nails. What I found with Gelish is that it can last longer than other gel polishes, with some of my clients it has lasted 3 weeks! But the main reason I picked Gelish is because of the huge colour range. 
So far I have 19 colours (I have a sheer colour painted on another colour wheel) which have all been really popular with my clients. Gelish often bring out new colour collections but instead of buying a full collection I prefer to choose the colours I like and I think my clients will like and also colours they have requested. Some of the most popular colours in my collection are the glitters, which looks lavish all year round. When choosing colours I go for what is in demand at the time, for example at Christmas I ordered shades of red, where as now it is coming to the summer I have started buying bright and vibrant shades which are highly sought-after. When it comes down to buying, Gelish is quite expensive so I try to order about 4 colours at a time. I order online so I go through the many colours and narrow it down to my favourites. I think the next colours I buy will be a silver glitter, turquoise glitter, yellow, coral and a red/pink. 
If you are one of my clients what colours would you like to see in my collection or if you use Gelish yourself what colour would you recommend?


'Carnival Hangover' and 'All That Glitters Is Gold' with Swarovski crystals


'My One Blue Love' and 'All That Glitters Is Gold' with Swarovski crystals

Thursday, 1 May 2014

Quote Of The Week

May Makeup Wish List


Starting from now, once every month I will be creating a makeup wish list. In the collage above I have put together some makeup items I am hoping to buy in the near future.

1. MAC 'CANDY YUM-YUM' Lipstick - I keep eyeing up this colour when I am at a MAC Counter but have not yet bought it, last time I chose 'Pure Zen' over this because I was looking for an every day colour. 'Candy Yum-Yum' is a very popular colour from MAC and has some great reviews. It is a very vivid, almost neon fuschia colour, if there was ever a shocking pink this is it! 

2. NARS 'Turkish Delight' Lipstick - Basically this colour is a favourite of Kim Kardashian so I have to have it! I usually buy MAC lip glosses but I'm dying to try some NARS products and with this being a big seller from the brand I think its a good place to start. This would be the perfect every day lip gloss and it would also look gorgeous with some smokey eyes.

3. Stila 'Dusty Rose' Magnificent Metals Foil Finish Eyeshadow in - The Stila metallic eye shadows come in a range of colours, but at around £33.00 per pot they are rather pricey so I have picked my favourite colour from the range and hope to eventually build a collection. Although this product is expensive I have read reviews which say the eyeshadows are worth every penny. I have seen various youtubers using this product and I must say they do look gorgeous! 

4. MAC Prep + Prime Highlighter - I am currently using Rimmel 'Wake Me up' concealer as my under eye highlight and also as a highlight when contouring, I have almost ran out of that so I am planning to replace it with MAC Prep + Prime as I have heard great reviews about it. I am usually happy with MAC products so I am sure this wont disappoint. 

5. MAC 'In Anticipation' Pro Longwear Lip Pencil - If you are going to buy a MAC Lip Pencil I would definitely go for a Pro Longwear rather than a regular lip pencil. The Pro Longwear pencils stain your lips so the colour lasts hours where as I feel the others wear off really easily. The colour 'In Anticipation' is versatile and could be used with nude pink lipsticks as well as bright pinks. I think this lip pencil would be a useful addition to my makeup kit.  

6. MAC 'Retrospeck' Eyeshadow - Another product I have heard good reviews about and again I have seen a lot of youtubers referring to this colour, in particular Tanya Burr. However I have heard this colour looks better against lighter skin tones so I will have to ensure this colour will work for me before purchasing. I have space left for one more eyeshadow in my MAC neutral palette so this is possibly the colour I will go for. 

7. Crown Brush 10 Colour Concealer Palette - This is a very popular product used by many beauty bloggers and youtubers. There are a lot of similar products on the market but I want to go for a brand I know of. This palette will be great for concealing but I will use it mostly for contouring, there will be a shade to work with for all skin tones so I can use this on clients as well as myself. 

8. Benefit 'Watt's Up' Highlighter - I only wear a cheekbone highlight when I am going for a full on makeup look for a night time or special occasion and when I do I use MAC 'Gleam' eyeshadow. However I am looking for a more subtle high light and I prefer cream highlighters as I think the finish with a cream is more 'glowy'. I have tried Benefits 'High Beam' and 'Moon Beam' highlighters in the past and I loved those so I am sure this one will be gorgeous too! 

Sunday, 27 April 2014

My 5 Favourite Makeup Products At The Moment

Benefit 'That Gal' Brightening Primer

I have recently fell in love with this product after using up a sample I received when I bought the Benefit 'Porefessional' Primer, as soon as I ran out of the sample I purchased it in full size. There is so much to like about this product; some of the ingredients in this primer are raspberry and camomile which gives it a gorgeous, refreshing fruity smell. The texture is like silk, it applies so smoothly and creates the perfect base for foundation. The primer does what it says on the label, it truly does brighten up my skin even when foundation is applied on top my skin in still glowing. Also it does the job of keeping my makeup in place. 'That Gal' is now my favourite primer and part of my everyday makeup routine. 


Chanel Perfection Lumiere 50 Beige 

I think I may have found my perfect foundation! As I have said before I have tried Chanel Vita Lumiere and Lift Lumiere, along with many other foundations and was dissatisfied with them, but this one is 'perfection'. It answers all my prayers when it comes to foundation; the coverage, colour, finish and durability tick all the boxes. Initially I thought that Perfection Lumiere might be too heavy for me as it is described as a full coverage and matte finish foundation. So I tried a sample first and found that the coverage is adjustable, meaning you can build the foundation up to create the coverage and finish to suit you. This and 'That Gal' primer are a perfect combination. 


MAC 'Painterly' Paint Pot 

This product creates the perfect smooth base for eyeshadow making it easier to apply and blend and prevents the eyeshadow from creasing and wearing off through out the day/night. I use this every time I apply eyeshadow.


MAC 'Pure Zen' Lipstick 

This semi sheer peach/pink lipstick is my favourite nude colour to date. It is the perfect everyday lipstick and also works with so many makeup looks. This lipstick is a Creamsheen formula, the finish is more like that of a lipgloss and is really moisturising. This teamed with MAC 'Dervish' lip pencil is my go-to at the moment. 


MAC 'Mulch' Eyeshadow 

The colour 'Mulch' is described as 'red brown with bronze pearl'. One of the reasons I love this eyeshadow is because I think it makes my green eyes 'pop'. Like most MAC eyeshadows it is well pigmented and so easy to work with and blend.  
This colour is so easy to work with, it looks gorgeous on its own applied all over the lid and below the lower lash line, I wore this last week and it reminded me of a Mila Kunis eye makeup look I had seen. This colour also works with so many colours, I use it alot in the outer corners teamed with colours such as MAC 'All That Glitters' or 'Patina'. I find myself referring to this colour a lot and it is definitely one of my most used colours in my palette. 


In the following images I have incorporated 'Mulch' in to 2 eye looks...

1. 
MAC 'Painterly' Paint Pot
MAC 'All That Glitters' eyelids
MAC 'Cork' in crease and blended out
MAC 'Mulch' outer corners and lower lash lines
MAC 'Shroom' inner corners and brow bones
MAC Liquidlast Liner 'Point Black' top lash lines and water lines
HD Pro Eye and Brow Pro Palette 'Medium Brown' brows 


2.
MAC 'Painterly' Paint Pot
MAC 'Mulch' eyelids and blended slightly above crease and on lower lash lines 
MAC 'Wedge' used as a transition colour above crease to blend out 'Mulch' 
MAC Liquidlast Liner 'Point Black' water lines

Thursday, 10 April 2014

Tan Truth Spray Tan Review


I have tried so many spray tan solutions since getting a spray tan machine and even before that I use to treat myself to a spray tan once in a while when I was going somewhere special. Now I have a spray tan near enough every week, its so much easier to jump in the tent and be sprayed rather than applying a lotion or mouse, rubbing it in, making sure its even and struggling to reach your back, it seems to take forever! However a spray tan is done in under 10 minutes and all it takes for the best results is a little moisturiser applied to the dry areas (hands, feet, elbows, knees) to prevent the tan building up on the dry skin and someone you trust with a spray gun! Of course preparation is key as it is with any tanning product, you must exfoliate and shave at least 24 hours before tanning for the best results. You can't expect a fresh even tan with dry patches and traces of last weeks remaining tan (but us beauticians try our best under all circumstances). A few other spray tan top tips are to wear a hair net to prevent your hair from the tan, 'sticky feet' to prevent the soles of your feet from the tan when stood in the tent and also giving the palms of your hands a little wipe after the spray tan.
With that said you can probably tell what is my favourite tanning method and it goes with out saying that we should all keep off sun beds or at least use them in moderation. 
In the past I have bought spray tan solutions from various brands including Sienna X, Famous Dave, Laurens Way and Sol Glo and some of the tans I have had from other salons include Fake Bake and California Tan.
I have never had a really horrible spray tan, however with most I have thought there could be room for improvement but for me, Tan Truth is an all rounder! 
Tan Truth has so many benefits, not only do you get the gorgeous tan you long for but its with out all the dreaded side effects. First of all,  this is the only spray tan where I have felt dry enough to get in to my clothes just minutes after being sprayed and when I am dressed I don't feel like my clothes are clinging to me, so many of my clients have commented on this. Another thing I use to hate about spray tans is when you sleep in your tan over night and you wake up the next morning and feel so dirty and you just want to jump in the shower as soon as you get out of bed, with this tan I feel like I have nothing on my skin, I feel quite fresh but of course I feel even better when I wash it off to reveal a perfect streak free tan. When people think of any tanning product they think of the smell, but again I must say this tan wins in this field! Of course it does have a scent but its not strong or unpleasant and the smell isn't left lingering on your bed sheets like other tans. Another problem I have had with spray tans is those 2 hour baths I have found myself in, struggling to remove the tan, but not with this one! This has been the easiest to remove of all I have tried. You also get your weeks worth with this one, most tans are said to last up to a week but I have found some tans fading after just 2 days, most around 4-5 but I would say Tan Truth starts fading after 6 days. I have also never found myself with that scaley and patchy skin you get when the tan is wearing away. One of the main things I love about this tan is the colour. Most importantly its not orange, orange is not a good look! I think this tan is really natural looking, it has that holiday feel, I would describe it as a golden bronze and sun kissed. 
There are 2 shades of this tan 9% which is described as the ultimate natural, golden tan and 13% a deeper, darker tan. I would recommend those who are new to spray tans to get the 9% and for myself I prefer this as a day to day tan. If I was having a night out I would go for the 13% and I would advise all the tan lovers to get this too! 
After trying and testing in search of the tan I thought was best for me and my clients Tan Truth was the winner, it won in every field! Its great value for money and all my clients have been happy with their tan and I have had lots of recommendations and returning customers. 

With my 13% dark Tan Truth spray tan 
Full Outfit - Chic Boutique Darlington 
Shoes - Bank

So if you haven't tried it, book your Tan Truth spray tan now at Rose Beautique Darlington!